Seasoning a Dutch oven is an essential process that not only enhances its cooking performance but also extends its lifespan. Whether you're a seasoned chef or a cooking enthusiast, mastering the art of Dutch oven seasoning can transform your culinary experience. Proper seasoning creates a natural non-stick surface and prevents rust, ensuring your cookware remains in top condition for years to come.
Dutch ovens have been a staple in kitchens for centuries, and for good reason. Their versatility and durability make them an invaluable tool for cooking everything from hearty stews to perfectly baked bread. However, to fully harness the potential of this versatile cookware, proper seasoning is crucial. Without proper care, your Dutch oven can become prone to rust and lose its non-stick qualities.
In this comprehensive guide, we will delve into the world of Dutch oven seasoning. From understanding the importance of seasoning to step-by-step instructions and expert tips, this article will equip you with everything you need to know to keep your Dutch oven in pristine condition. So, let's get started!
Read also:Understanding The Controversy Alien Saying Faggot
Table of Contents
- Why Seasoning Your Dutch Oven Matters
- A Brief History of Dutch Ovens
- Preparing Your Dutch Oven for Seasoning
- Step-by-Step Guide to Dutch Oven Seasoning
- Common Mistakes to Avoid
- Maintaining Your Seasoned Dutch Oven
- Variations in Seasoning Methods
- Troubleshooting Common Issues
- Benefits of a Well-Seasoned Dutch Oven
- Conclusion: Take Your Dutch Oven to the Next Level
Why Seasoning Your Dutch Oven Matters
Understanding the Science Behind Seasoning
Seasoning a Dutch oven involves creating a protective layer of polymerized oil on the cookware's surface. This process not only prevents rust but also creates a natural non-stick surface, making cooking and cleaning easier. Over time, this layer becomes more robust, enhancing the cookware's performance and durability.
Cast iron, the primary material used in Dutch ovens, is prone to rust if not properly cared for. Seasoning forms a barrier that protects the iron from moisture and air exposure, ensuring your Dutch oven remains in excellent condition.
A Brief History of Dutch Ovens
The Evolution of a Kitchen Staple
Dutch ovens have a rich history that dates back to the early 18th century. Initially developed in Europe, these heavy-duty pots quickly gained popularity for their ability to cook food evenly and retain heat for extended periods. The term "Dutch oven" is believed to have originated from the method of casting iron used by Dutch traders.
Today, Dutch ovens are available in various materials, including enameled cast iron, stainless steel, and traditional cast iron. Despite these advancements, proper seasoning remains a fundamental aspect of maintaining their quality and performance.
Preparing Your Dutch Oven for Seasoning
Step 1: Cleaning Your Dutch Oven
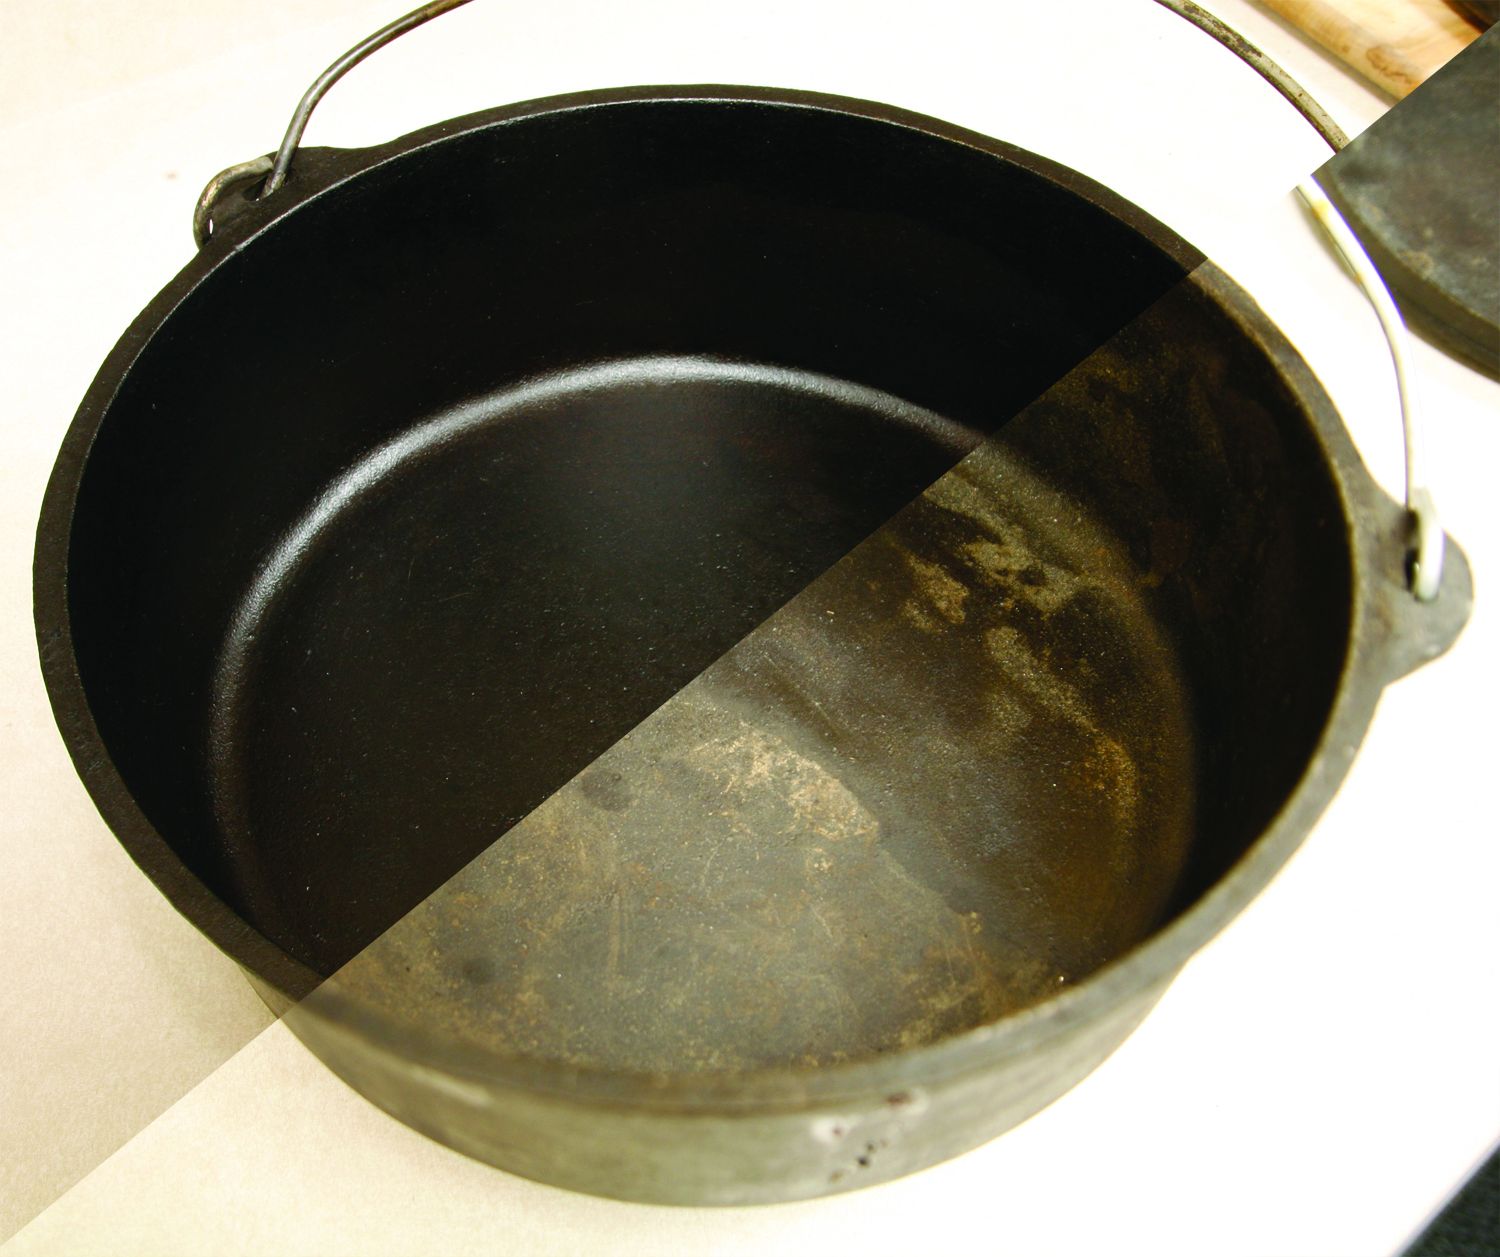
Before seasoning, it's crucial to thoroughly clean your Dutch oven. Use warm water and a stiff brush to remove any debris or rust. Avoid using soap, as it can strip away any existing seasoning. For stubborn rust spots, a mixture of baking soda and water can help.
Step 2: Drying the Surface
After cleaning, dry the Dutch oven completely. Place it in a preheated oven at 200°F (93°C) for about 15 minutes to ensure all moisture is removed. A dry surface is essential for effective seasoning.
Read also:Unlock The Trend Crafting The Ultimate Y2k Usernames For Tiktok
Step-by-Step Guide to Dutch Oven Seasoning
Selecting the Right Oil
Choosing the right oil is vital for successful seasoning. Options like flaxseed oil, vegetable oil, or grapeseed oil are popular choices due to their high smoke points and ability to polymerize effectively. Avoid using olive oil or butter, as they can degrade over time.
Applying the Oil
- Preheat your oven to 350°F (175°C).
- Apply a thin, even layer of oil to the entire Dutch oven, including the lid and exterior.
- Use a lint-free cloth or paper towel to wipe away any excess oil, ensuring no pooling occurs.
Baking the Dutch Oven
Place the Dutch oven upside down on the middle rack of your preheated oven. Insert a baking sheet or aluminum foil on the lower rack to catch any drips. Bake for one hour, then turn off the oven and allow the Dutch oven to cool completely inside.
Common Mistakes to Avoid
Applying Too Much Oil
One of the most common mistakes is applying too much oil, which can lead to a sticky, uneven finish. Always use a thin layer and wipe away any excess to achieve the best results.
Skipping the Preheating Step
Preheating the oven ensures the Dutch oven reaches the optimal temperature for effective seasoning. Skipping this step can result in an uneven layer and reduced durability.
Maintaining Your Seasoned Dutch Oven
Proper Cleaning Techniques
To maintain your Dutch oven's seasoning, avoid using soap or abrasive scrubbers. Instead, clean it with hot water and a stiff brush. For stuck-on food, fill the Dutch oven with hot water and let it soak for a few minutes before scrubbing.
Re-seasoning When Necessary
Over time, the seasoning may wear off due to frequent use or improper cleaning. Re-season your Dutch oven as needed by following the same steps outlined earlier. Regular maintenance ensures your cookware remains in top condition.
Variations in Seasoning Methods
Using Different Oils
While flaxseed oil is often recommended for seasoning, other oils like vegetable or canola oil can also be effective. Experiment with different oils to find the one that works best for your needs and preferences.
Electric vs. Gas Ovens
The type of oven you use can affect the seasoning process. Electric ovens tend to provide more consistent heat, while gas ovens may require additional attention to ensure even distribution.
Troubleshooting Common Issues
Sticky Surface
A sticky surface usually indicates too much oil was applied during seasoning. To fix this, re-bake the Dutch oven at a higher temperature (400°F/200°C) for 30 minutes to fully polymerize the oil.
Rust Formation
If rust appears, scrub it off with steel wool or a rust remover. Then, re-season the Dutch oven following the standard procedure.
Benefits of a Well-Seasoned Dutch Oven
Enhanced Cooking Performance
A well-seasoned Dutch oven provides superior heat retention and even cooking, making it ideal for a wide range of recipes. From braising meats to baking bread, your cookware will perform flawlessly.
Longer Lifespan
Proper seasoning significantly extends the lifespan of your Dutch oven by protecting it from rust and wear. With regular maintenance, your cookware can last for generations.
Conclusion: Take Your Dutch Oven to the Next Level
Seasoning your Dutch oven is a simple yet crucial process that enhances its performance and longevity. By following the steps outlined in this guide, you can ensure your cookware remains in excellent condition for years to come. Remember to avoid common mistakes, maintain your seasoning regularly, and troubleshoot any issues that arise.
We invite you to share your experiences with Dutch oven seasoning in the comments below. Have you tried any unique methods or oils? Additionally, feel free to explore our other articles for more tips and tricks on culinary excellence. Happy cooking!
Data sourced from reputable cooking resources such as Cast Iron Cooking and Cookware.org.